3D Viewer Controls
The 3D viewer is built on 3Dmol.js and renders the protein, the docked ligand pose, and color-coded interaction lines. This page is the full reference for every control.

Mouse and touch controls
| Action | Mouse | Trackpad / touch |
|---|---|---|
| Rotate | Left-click + drag | One-finger drag |
| Pan | Right-click + drag (or Ctrl + click + drag on macOS) |
Two-finger drag |
| Zoom | Scroll wheel | Pinch |
| Inspect atom | Click an atom | Tap an atom |
Clicking an atom opens a popup with element symbol, residue, chain, and coordinates.
Protein representation
The Protein style controls how the receptor is drawn:
| Style | Description |
|---|---|
| Cartoon (default) | Standard ribbon-and-arrow secondary structure |
| Ribbon | Smoothed C-α trace with width |
| Tube | Thin uniform tube along the backbone |
| Trace | C-α line trace, no thickness |
A Show cartoon toggle lets you hide the backbone entirely (useful when focusing on pocket residues).
Protein coloring
| Scheme | Description |
|---|---|
| Spectrum (default) | Rainbow N-terminus → C-terminus |
| Secondary structure | Helix / sheet / loop colored separately |
| Hydrophobicity | Kyte–Doolittle hydrophobicity per residue |
| B-factor | Crystallographic B-factor (heat map) |
| Chain | One color per chain |
Ligand representation
| Style | Description |
|---|---|
| Stick (default) | Bond-thickness lines, no atom spheres |
| Ball & Stick | Spheres at atoms + sticks for bonds |
| Sphere | Space-filling spheres (CPK) |
Pocket and surface toggles
| Toggle | Effect |
|---|---|
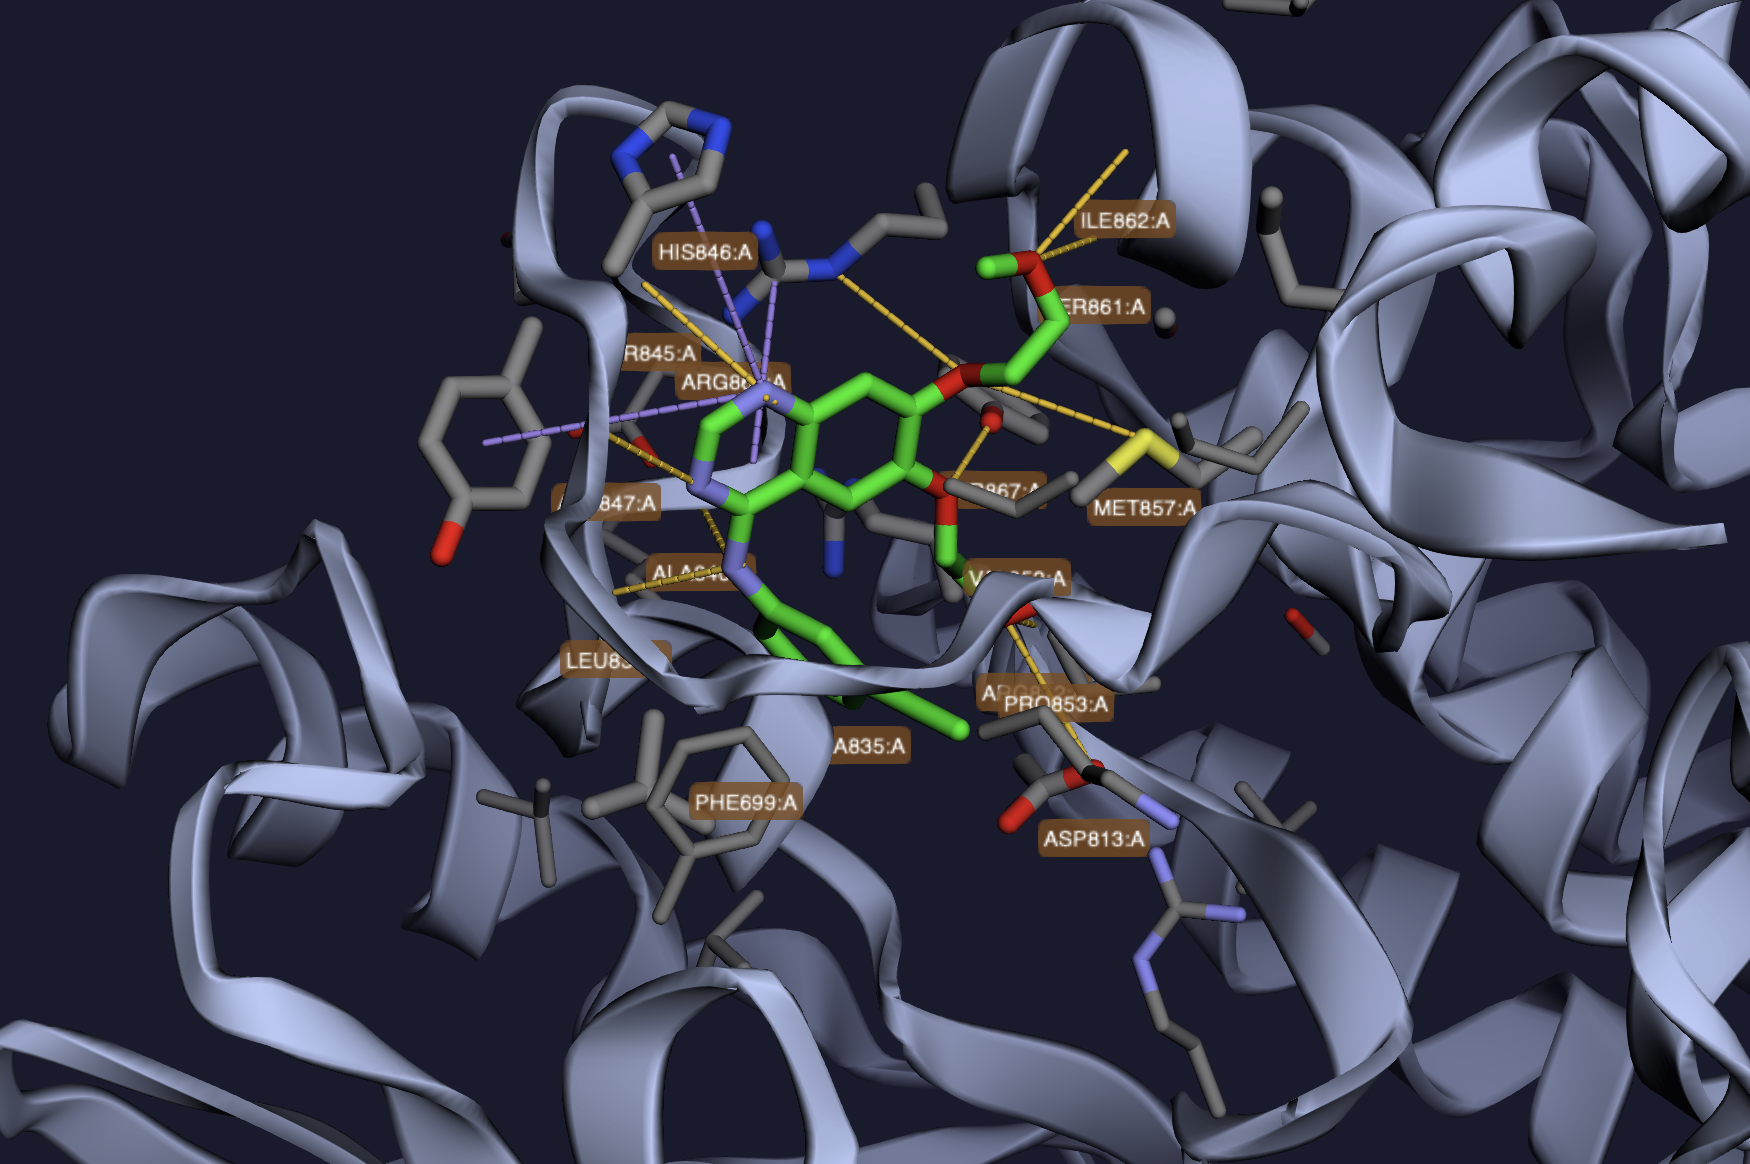
| Pocket residues | Show residues within 5 Å of the ligand as sticks |
| Pocket surface | Render the molecular surface around the binding site, colored by P2Rank probability (red = high, blue = low) |
| Protein surface | Render the full protein molecular surface (semi-transparent) |
The pocket surface is the most useful: it gives you a sense of pocket geometry without obscuring the ligand.
Labels and distances
| Toggle | Effect |
|---|---|
| Distances (on by default) | Draw dashed lines between interacting atoms with distance labels in Å |
| Labels | Show atom and residue labels at hover positions |
Camera controls
| Button | Action |
|---|---|
| Reset view | Return to the auto-fitted starting camera |
| Fullscreen | Expand the viewer to the entire window; the sidebar collapses behind a toggle |
| Save PNG | Download the current 3D view as a PNG image |
In fullscreen mode the results sidebar slides out of view; click the chevron at the right edge to bring it back without exiting fullscreen.
Recording video
Two buttons in the viewer toolbar let you save short video clips of the 3D scene — useful for slide decks, papers, or sharing a binding-mode story over chat.
| Button | What it does |
|---|---|
| ● Record | Toggle. Click to start recording the canvas; click again (now labeled ■ Stop) to finish. Interact freely while recording — rotation, zoom, pose switches, toggling interaction overlays are all captured. |
| Turntable | One-click 360° rotation around the vertical axis over ~20 seconds, then auto-stops and saves. Best for figures showing how a ligand sits in a pocket from all angles. |
A red ● REC 0:nn badge in the top-left of the viewer shows recording is live. Turntable mode also shows a thin progress bar across the bottom of the viewer.
Output format
Recordings are saved as WebM in Chrome, Firefox, and Edge (VP9 or VP8 codec). Safari 14.1+ saves as MP4 natively. Either plays in browsers, Slack, Discord, VLC, and modern PowerPoint/Keynote.
If you need MP4 specifically (older Office, certain journal submission systems), convert the WebM locally with VLC's Convert/Save menu or ffmpeg -i input.webm -c:v libx264 output.mp4.
Tips for good recordings
- Maximize the browser window or hit Fullscreen first. Recording captures whatever pixel size the canvas currently has — bigger window = sharper video.
- Set up your view before clicking Record. Toggle Cartoon, Pocket Residues, Distances, and any interaction types you want shown so the recording starts in the right state.
- For pose comparisons, start a manual recording, click between rows in the results table, and let the viewer load each pose for ~2 seconds before switching.
- File sizes: a 20-second turntable at 720p is 8–16 MB; a 30-second manual recording is 12–25 MB. The encoder runs on the GPU where supported, so CPU impact during recording is small.
Switching poses
Click any row in the results table to load that pose. The previous ligand model is removed and the new one is loaded from /api/jobs/<job_id>/files/<pose_file> — the camera does not reset automatically (use Reset view if you want to refit). Loaded poses are cached in the browser, so flipping back and forth between poses you've already viewed is instantaneous.
Switching pockets
Pockets are selected indirectly: each row in the results table belongs to one pocket, so picking a pose from a different pocket switches the displayed pocket. The pocket surface and pocket-residue selection update automatically to follow the new ligand.
Performance tips
- Hide the protein surface when rotating large structures — it's the most expensive thing to render.
- Switch to Trace for proteins above ~1000 residues if rotation feels laggy.
- Disable interaction distance lines if you have a lot of contacts and the scene is cluttered. Re-enable from the interaction controls.